 2023-09-16

With the increasingly fierce competition in the automobile industry, model updates are getting faster and faster, and the cycle is getting shorter and shorter. The mold development department needs to summarize and analyze each link of mold development and shorten the development cycle to achieve the purpose of improving mold development efficiency.
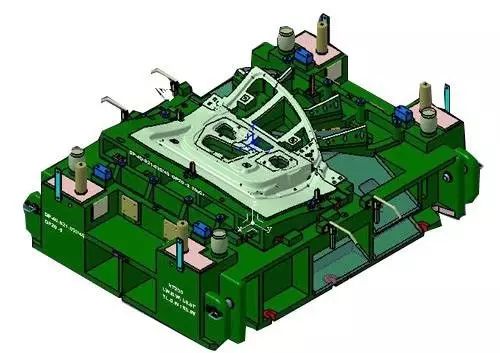
The development of automobile panel molds is divided into two stages: design and manufacturing. Design includes stamping SE, stamping process DL drawing design, CAE analysis and die surface compensation design, CAM die surface design, die structure design, FMC, structure and die surface programming. Manufacturing includes FMC production, casting and forging blank preparation, primary processing, and preliminary processing. Processes such as assembly, secondary processing, assembly, research and development, debugging, quality improvement and delivery. In the mold development cycle, the mold design cycle for the entire vehicle is usually about 4 to 5 months, while the mold manufacturing cycle is as long as 12 months, and debugging and quality improvement account for 5 to 6.5 months. Therefore, improving the manufacturing efficiency of the mold is crucial to shortening the mold development cycle. The development cycle is significant.
Cover mold design and manufacturing status
The development of cover molds has made great progress in technology in recent years. Most of them have realized three-dimensional DL drawing design, carried out full-process CAE analysis on the process, started mold surface compensation design, and carried out unequal gap design on the mold surface. The mold structure is designed with three-dimensional entities, and dynamic interference simulation, scrap slide-out simulation, and stamping automatic line simulation are performed.
In mold manufacturing, FMC three-dimensional processing has been implemented, primary processing is fully programmed, secondary processing is automated, mold quenching (promoting medium frequency quenching and flame quenching), some companies have carried out laser quenching, and implemented post-fire profile finishing. Mold manufacturing has developed a "one flow" manufacturing model.
The main reasons for the long mold manufacturing cycle include: difficulty in clamping some parts, inappropriate clearance between convex and concave molds, heavy research and development workload, defects such as cracking, wrinkling and springback of some parts that require repeated debugging and rectification, improper plan management and design errors, etc. .
Process and mold surface design issues
1. The product process is unreasonable, and it is difficult to completely solve it from the stamping process. The parts cannot meet the quality requirements, and debugging is difficult, resulting in mold changes or repeated debugging.
2. The CAE analysis parameter setting is unreasonable or the material performance selected in the analysis is better than the performance actually used in production. The analysis does not consider the safety margin or the special requirements of the product, resulting in a large deviation between the process design data and the manufacturing debugging results, resulting in repeated debugging. .
3. There are defects in process data or part product data, which need to be solved during debugging later.
4. The die surface gap design is unreasonable, resulting in a large workload for later research and development. The design does not take into account the thickness changes of the material during the part forming process, the concave center compensation of the machine tool, and the expansion treatment of the parts. The uncolored parts of the top cover drawing die were designed according to the thickness of the material. As a result, the remaining mold surface of the colored parts needed to be completely ground and matched, which wasted more than 30 hours.
5. The angle of the trimming edge is unreasonable, or burrs are easily produced at the joint between the front trimming and side trimming, which often results in repeated debugging. The trimming edge expansion accuracy is insufficient or the sample verification is inaccurate, resulting in edge adjustment and repair welding processing. In particular, sometimes the rectified edge is not vertical, not sharp, and has uneven gaps, resulting in burrs and requiring multiple adjustments.
6. The mold surface design does not take into account the large area for root cleaning or strong pressing, which requires a large amount of work for root cleaning or grinding by fitters.
7. The process information is not transmitted in place. For example, the fitters do not understand the grinding and joining requirements of each part of the mold, and the surface treatment personnel do not understand the quenching area in place, resulting in rework or long information confirmation time.
Mold design and manufacturing process issues
1. The mold vents and screw holes have not been designed, so they need to be drilled by the fitter. In order to get rid of the ribs on the back, it is time-consuming and laborious to find the location of the vents. The screw holes need to be made in series, and the cycle is long. Sideways hole fitters are less efficient at drilling holes.
2. It is difficult to clamp wedges, sliders, etc. or some small pieces. The design does not consider the clamping process chuck, which is often added on site during the review. There are no chucks that require multiple clampings to complete during processing, and the processing accuracy is low; some are added on-site during real-shape production, and the programming does not understand the position of the chuck, and the program does not match the actual object, which can easily cause safety hazards such as tool collision. Often results in duplication of procedures.
3. There is no standard for mold identification and no identification of design entities. Especially in the production without drawings, when the casting pieces first enter the factory, it is difficult to distinguish and search the parts, which wastes time in distinguishing.
4. The profile milling processing parameters need to be optimized. The traditional setting of the finishing allowance is 0.15mm, and the accuracy after fine milling of the die surface is ±0.05mm. The surface roughness does not meet the requirements, the dimensional accuracy is poor, the grinding workload is large, and the cycle is long.
5. In terms of process design, trimming, reshaping the panel surface and cutting edge are processed after the mold base and the panel screws are fastened together. The serial processing of the mold base and the panel affects the manufacturing cycle of the mold.
Stamping process and die surface design considerations
1. Carry out stamping SE upon receiving the product digital model, combine the database, CAE analysis results and review form content, apply FEMA technology for analysis, communicate product issues with the product design department in the form of an ECR report, and optimize the product process to the maximum extent nature, when designing the process plan, consider the quality assurance of the parts.
2.CAE Actuarial Science. Establish CAE parameter setting specifications and evaluation standards for internal and external panels and typical parts, and establish a library of digital-analog remanufacturing compensation solutions for typical parts. For example, CAE safety margin requirements, material selection requirements, various material thinning rate requirements, material slip requirements, and part qualification rate requirements for full process analysis, etc. Only those who meet the requirements can proceed. The shrinkage lines are carved on the mold and the grid is set on the blank. When debugging the parts, CAE is compared with the debugging and the results are included in the data.
3. Add the confirmation link of processing die surface data and product data to the design process, evaluate the outer panel parts during CAE analysis, add die surface compensation for the depression, and reduce a large amount of research and assembly time for the fitters.
4. Establish mold surface gap design standards. When designing the drawing die surface, consider using the concave center of the stamping machine tool (detect and debug the concave center of the punch machine and the user's machine tool workbench and slider, and establish a database), and compensate for the die surface lifting according to the size and type of the part; the drawing die surface Design for expansion processing; gap treatment on the drawbead management surface's strong pressure and open surface; consideration of the functional surface of the part and clearance treatment of the strong pressure and open area to resolve springback; gap compensation on the mold surface considering material thinning; post-sequence mold Mold surface design, negative clearance between the strong pressure area of the press and the shaping piece gap; compensation for the die surface gap where the material becomes thinner.
5. The process design attaches great importance to the problem of trimming burrs, and prioritizes trimming in order when conditions permit. The data verification summary of the edge line development improves the accuracy of CAE analysis, ensures accurate blank development, and cancels the edge line verification content.
6. When establishing the standard mold surface design, perform root-clearing design on non-important fillets.
7. The timely and accurate transmission of design information is an important part of reducing duplication. In order to ensure the smooth flow of information, establish specifications and information sheets, such as issuing data transfer sheets, developing and matching color cards, and quenching area instructions for turning molds, etc. , specifications and information sheets are placed in PDM and ERP.
Mold structure design and manufacturing process optimization
1. Vent holes and screw holes. Mold exhaust holes and screw holes are designed and punched out on CNC milling, or vertical holes are punched out laterally on CNC milling, and vertical holes are drilled by fitters to shorten drilling time and improve accuracy.
2. Establish specifications for the clamping support system of special-shaped punches, wedges, sliders and other parts, and design reserved process chucks to unify programming and processing and improve processing efficiency and accuracy. An example of designing the slider's chuck and clamping is shown in Figure 9.
3. Mold identification. Combining the characteristics of each user and mold factory, establish a mold marking standard, design a mark or mark printing position on the casting mold base and pieces, and cast it on the casting first. The operator can search according to the mark or install it according to the mark. It also facilitates mold maintenance. Figure 10 shows an example of marking the punching die slide block and mounting surface.
4. Research the process parameters of numerical milling profile processing that affect accuracy and efficiency, and set optimization specifications for tool speed, feed, step distance, cutting method and allowance based on the characteristics of each part of the part. For example, the die surface finishing allowance is adjusted to 0.05mm, and the tool speed and feed are adjusted. The semi-finishing and finishing efficiency of the die surface is increased by more than 40%, and the surface roughness and accuracy are also greatly improved.
5. Adjustment of the process route for trimming and turning of pieces. Trimming and refinishing the profile and cutting edge of the piece are processed step by step, and then assembled after heat treatment. For the cutting edge of the trimming mold, only the margin for finishing after heat is left, which is implemented separately from the programming point of view, saving time on assembly. Block surface and edge processing and heat treatment cycles.
Conclusion
With the improvement of the cover mold database and the in-depth application of analysis software, as well as the improvement of machine tool processing accuracy, as long as the design work in the technical stage is refined, the aforementioned issues are considered in the design stage, from product design, process design and mold design. Starting from the source, conducting sufficient virtual verification, preventing problems that have occurred before or defects found in analysis, taking early measures, and transmitting information in place can reduce assembly, processing, clamping and auxiliary time, and improve manufacturing accuracy, which will inevitably greatly improve the manufacturing accuracy. Dadi reduces the development time and debugging times, meets the quality requirements of stamping parts, and ultimately achieves the purpose of shortening the mold manufacturing cycle.


